
3D Printed Brutalist Concrete Lamp
So in my various feeds and online, the algorithm chose to present me with a reel of someone making a brutalist concrete lamp with a void, by making a form, filling it with sand, and then the remainder with concrete, to create a stunning brutalist concrete lamp.
You can absolutely buy them online, but I love making things, but concrete isn’t a medium I’d worked in before. And to be honest, it didn’t seem that much fun for me…
Write a computer program instead!
I do enjoy and spend quite a bit of time in Fusion 360 personally and professionally to design things for 3D printing. But it’s not always ideal for decorative items. That’s where Blender comes in; except I don’t know how to drive it and lack the time or energy to learn right now.
Something else I was researching recently was parametric CAD in code - so kind of what Fusion 360 does, but with a programming interface. There are some commercial options which I was trying to avoid as it was for hobby projects, but after some experimentation I’ve settled with and have been getting good results with build123d. Obviously there is a startup time to write these programs, so for simple one off things or things with very simple parametrization, Fusion 360 makes sense and will be much quicker. But for more complex things, it can be worth the time to get it properly coded in a full programming language. I’m working on some more complex things I hope to post about soon.
Turns out that LLMs are ok at this sort of thing, and they’re only improving with each new release. Once you work out how to describe it in a way that it can understand!
But what else can you parameterize? Turns out Blender has full Python support via an embedded interpreter - and it’s not an afterthought like ExtendScript is to Adobe products. And LLMs know how to use it with the right instructions and guidance.
So that’s what I did instead. Over a period of a few weeks, I worked with an LLM to generate a Python script to generate the lamp geometry inside Blender. As a bonus, this makes it parameterised - you can specify the size of the lamp and a bunch of other parameters, and it will generate a lamp exactly to these specifications.
The Blender Program
TL;DR: See the concrete lamp generator code on GitHub.
The LLM did a rather good job, but it did require some out of the box thinking that the LLM didn’t quite get to.
Most of the basic parts - the generation of the block, the void, the rebar, the cable channels, and even the 3D printed supports - all pretty straightforward for the LLM to understand and accomplish.
The texturing, provided by Blender’s modifiers, was also pretty straightforward to implement.
However, there were a few things that required some tuning and while remaining humble, some human intuition.
Aggregate Holes
The main issue I had was with the aggregate holes. The first approach that I asked the LLM to do was to randomly generate them throughout the area of the block. That’s fine, but often they’d end up in the void cutout, and as such, never actually intersect with the model.
So then I had the LLM generate them on the relevant faces instead (sides, top, front). Then, to get the “front” ones to appear on the surface of the void, I had the program check to see if the aggregate intersected with the block. If it didn’t, it moved it backwards (towards Y+) iteratively until it did intersect.
This kinda worked, and you could see in the debug view that the stones were being moved, but not all were moving backwards into the block. I tried several variations of it, but not properly understanding the mathematics myself, got a bit stuck with floating stones.
After a day or two of trying different solutions with the LLM, I had a thought while I was away from the computer: what if we instead took the object, query the faces of the object, calculate the normals to work out which direction they were pointing (so as to select front/sides/top and omit bottom/back), and then randomly generate the aggregate on those faces instead? I don’t mean to be “human over computer” but it’s those little jumps that the LLM wasn’t able to make at this time, but us slow humans were able to make.
I proposed this to the LLM and it immediately had a plan, and the result worked first time and gave the effect I had in mind. This is a great blend of human intuition matched by computers doing the legwork, to efficiently, safely, and quickly create something unique.
Boolean methods
The other issue I ran into, very much related to the aggregate holes, was that when I had too many aggregate holes, either the main block of the lamp would disappear from the model, or it wouldn’t correctly subtract the chamfer piece on the bottom, instead having that connected to the model.
I’ll be honest: I’m out of my depth with the math on this one, but I suspected it was related to overlapping geometry and the subtract or combine operations producing invalid results because of this. The LLM wasn’t able to figure it out after several debugging passes. It did however correctly work out that we needed to ensure that aggregates didn’t get placed near the chamfer cutter.
But the solution was actually pretty simple. As the script generates Blender operations and modifiers, these appear in order in the Blender UI. This means I could go through and tune settings and see the results straight away. In the end, it was simple - for the chamfer cutter, it used subtract in mode EXACT which failed. But mode FLOAT or MANIFOLD, it suddenly did what it was supposed to, as these handle the underlying mathematics differently. Updating the script by hand to do this then consistently generated working models with a variety of input parameters. Winning!
Printing
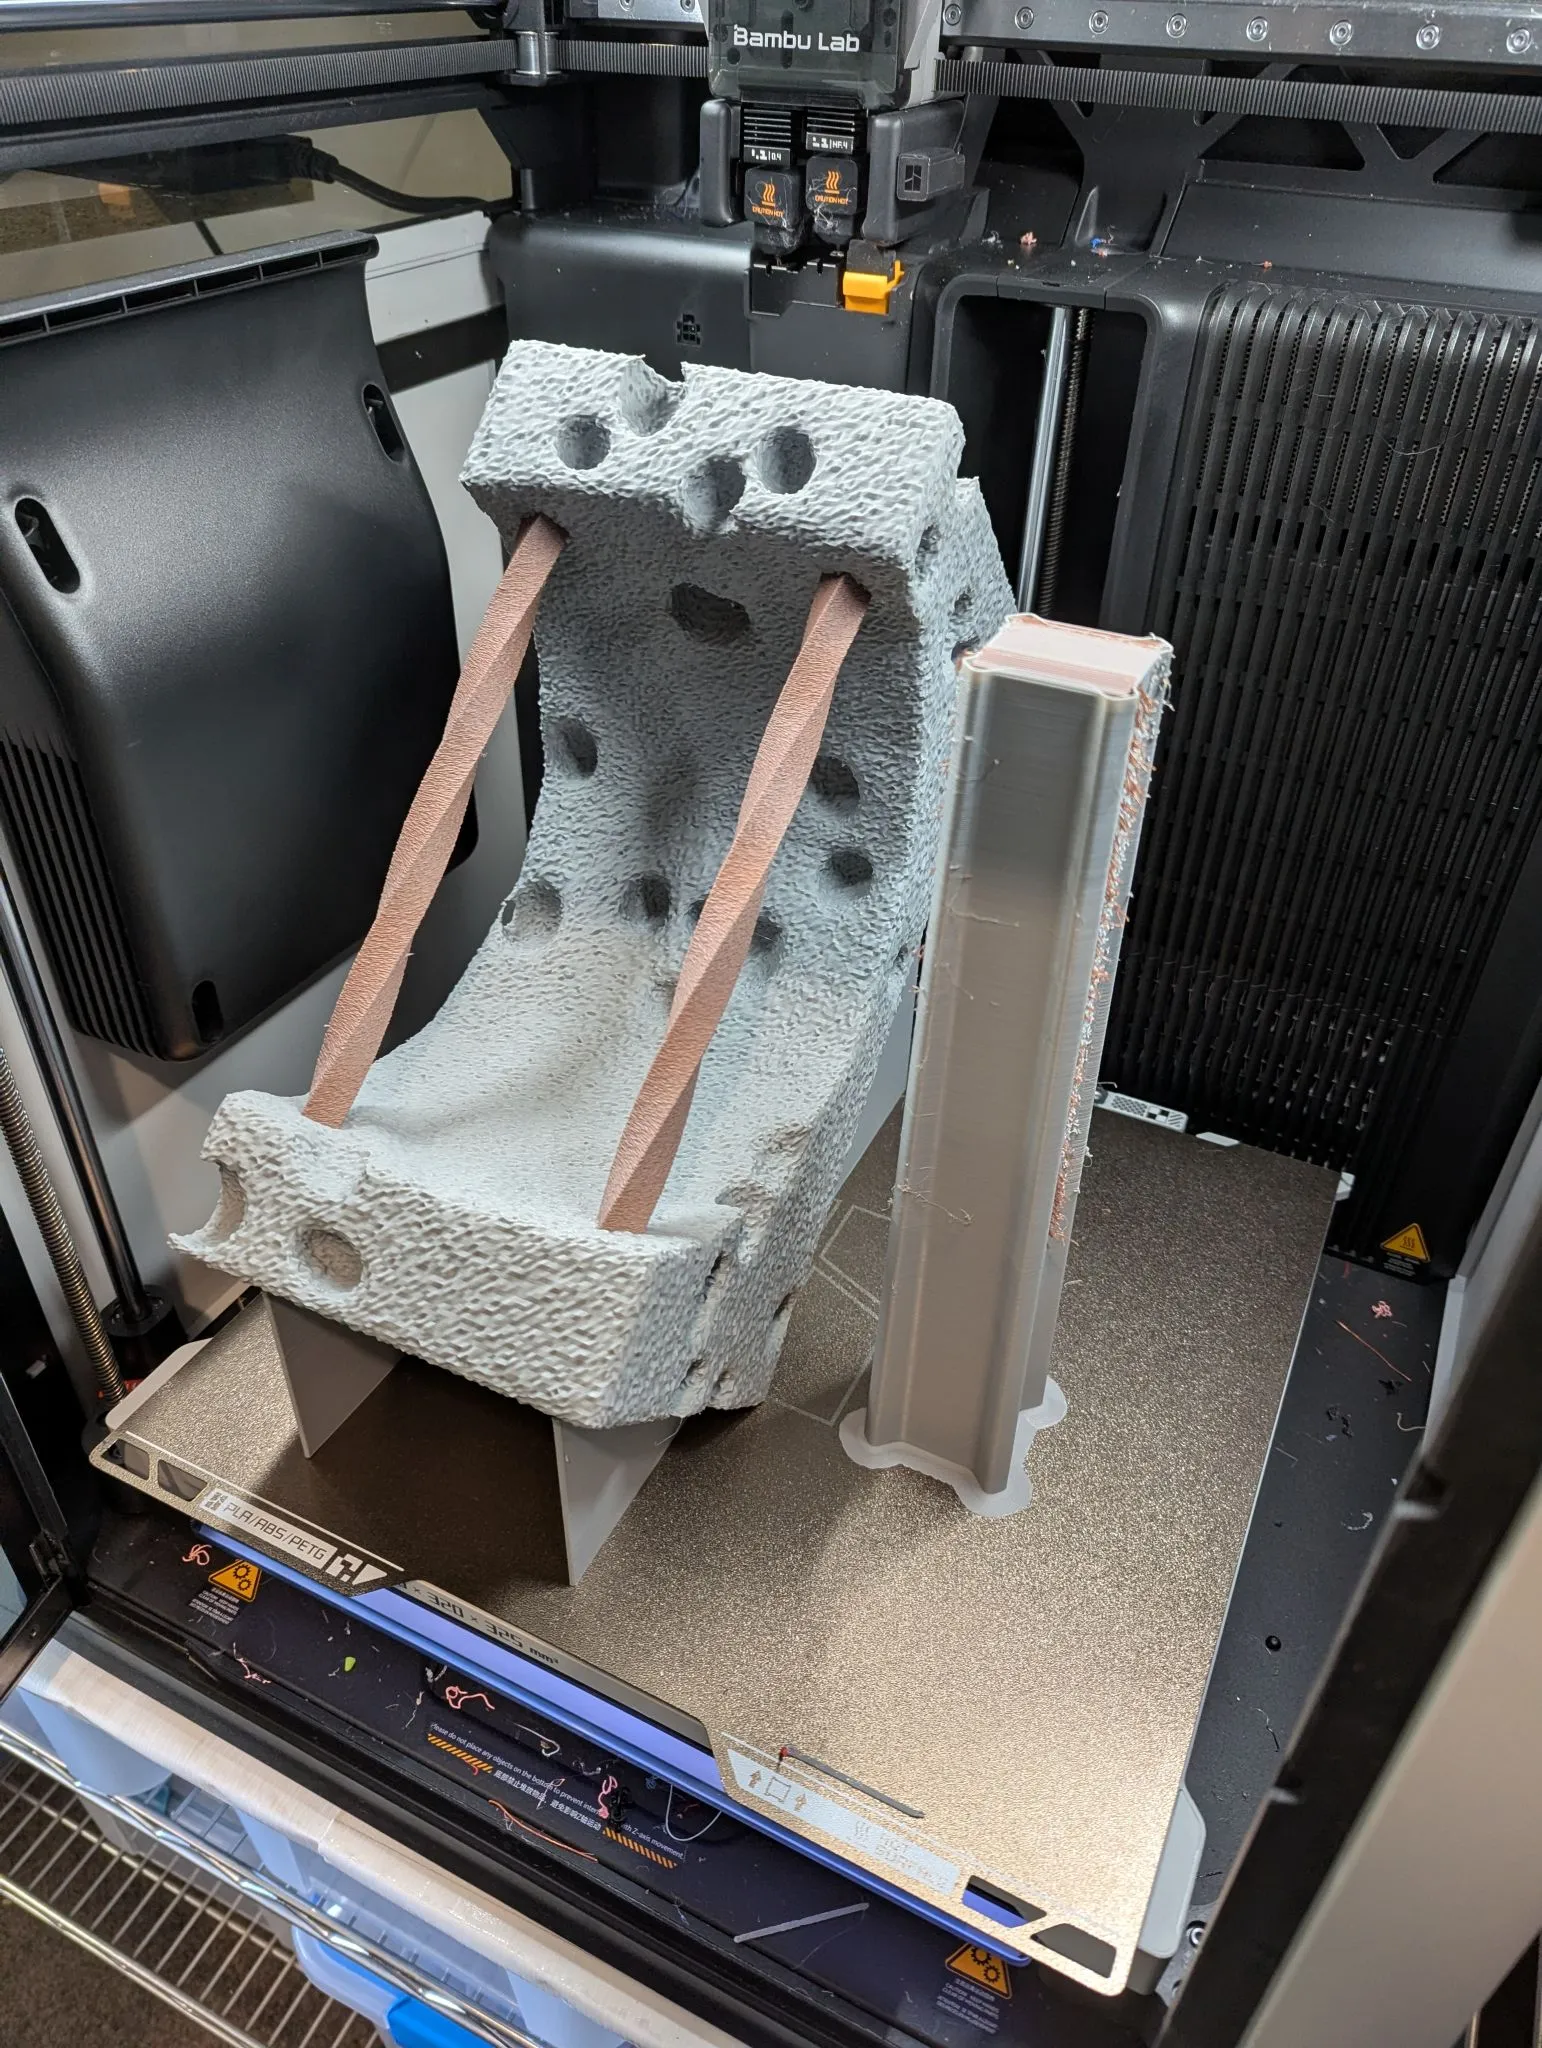
I’m fortunate to have a H2D, which allows for efficient printing of two colours, and also has a larger build area so we can print a lamp of this size. I also have a P1S, which this lamp will not fit in, and would need lots of colour changes to be able to print this.
The colours were dead simple: a gray PLA for the concrete, and a dark brown PLA for the rebar.
It still took 2 and a half days to print. But hey, that’s what the robot is for, right?
To eliminate the need for supports on visible faces, we tilt the print back 45 degrees. But this means you’d only have the back bottom edge on the build plate; not quite enough to hold it down. So the Blender program generates special supports for the bottom and back, angled to keep it at 45 degrees. It then also chamfers off a little bit of the bottom back edge, to allow that to sit flat on the build plate and give it the initial contact to ensure it doesn’t come up during printing. After printing, side cutters quickly remove the supports; it does leave quite visible marks, but I deliberately put them on the back and bottom to hide it.
I reduced the infill to 5%, which shaved off about 150g of filament from the print. It was about 900 grams of filament total. But the reduction of 150g means it fit in one spool of grey filament.
Then, we just apply a different colour filament to the rebar, and finally, fuzzy skin to the rebar to make that textured. I could have added this in Blender and may do so in the future, but for now, this works and produced a good enough solution.
I also used variable layer height to make sure I captured all the details as best I could. This added quite a lot to the print time, but hey, if it’s worth doing, it’s worth doing right.
I’ve also uploaded the model and print profile to Makerworld too.
Lamp hardware
It turns out I had these fancy 24V LED globes with E27 threads left over from a project many years before. I also had matching 24V 1A wall power supplies for them too as part of that same project. So these made the perfect, very safe, low voltage addition to these lamps to complete them.
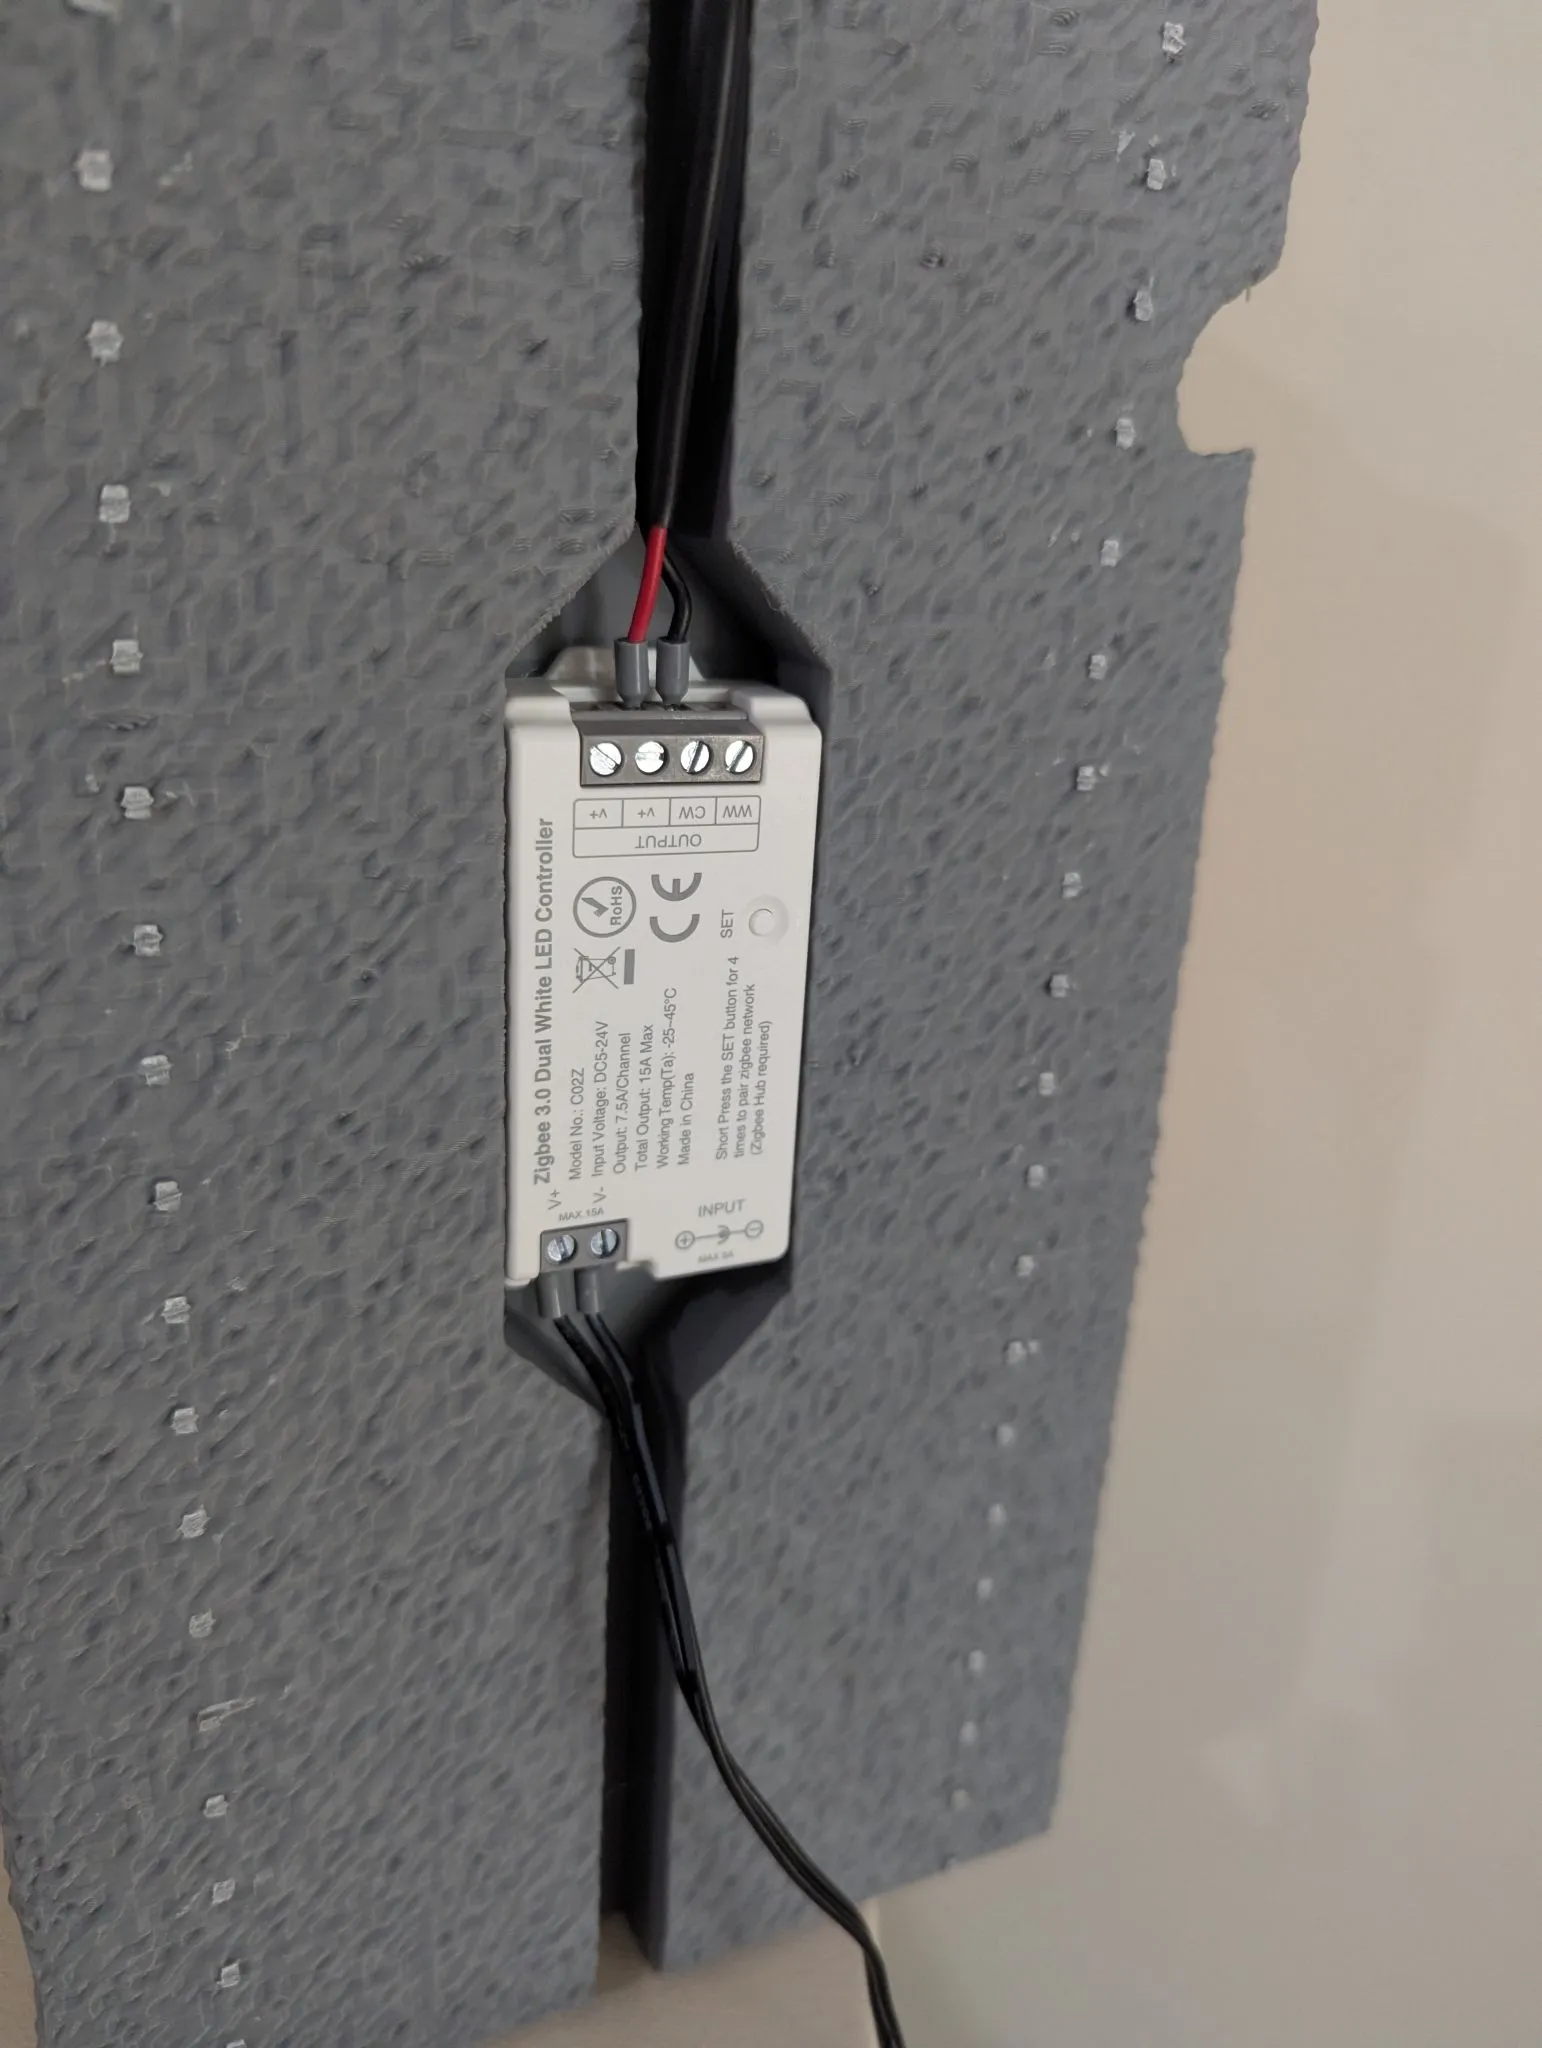
Then I found these very cheap Zigbee LED strip controllers (this one is a dual white, but they come in a variety of options from single colour up to RGBWW). They’re designed to work on low voltage DC, and they exactly accomplish what I need. So one of these inline with the wiring, with a special hole left in the back that’s exactly the right size for it, really finished the project. This also allowed me to connect it to the home automation system - the lamp lives in my theatre and now comes on and off with the main lights, so you can just enjoy it and not have yet another lamp to turn on and off!
Assembly
Dead simple - connect up your E27 socket, pull the wire through, trim to get the right lamp height, ferrule, and connect up. There really wasn’t much to it.
Future
As usual, I love it, but I also hate it!
But overall, I love it. My wife also loves it a bit too, so I’m going to need to print a bunch more of them for around the house.
What could I improve?
- Better texturing of the concrete. It’s a little rougher than I intended, but some tuning of the Blender settings will change this.
- More work on the aggregate; having move variation in the sizes.
- Tune the supports to make them much easier to remove and leave less marks on the surface.
But for now… I think I can call this done and move onto the other mad projects I have rolling around in my head…