
Temporary Pet-Resistant Flyscreens
Pet Cats. Cute, cuddly, but ultimately they just want to be free. So standard flyscreens are just “suggestions” to them…
The other solutions that are probably better
Said pet cats destroyed the flyscreens in our house by climbing on them. Said pet cats are indoor cats and ideally should not be roaming free as per our council suggestions and also just responsible pet ownership.
(I personally think we shouldn’t have pets - keeping a sentient animal trapped for our own personal amusement - but I acknowledge that we do treat our pets carefully and give them the best life they can have. Anyway, that’s a discussion for another time.)
Anyway, we need to keep the cats in, but be able to leverage the fresh air outside of the house when needed.
The obvious solution is to get aluminium flyscreen mesh, which I did, at great expense. But it’s very hard to install into the existing frames and very unforgiving. Due to my lack of skill, I went through over $100 worth of mesh and didn’t have any frames I’d be happy to have at home. In addition, that didn’t solve the problem where the cats can weigh down the mesh enough to make the splines give way, thus eliminating the mesh from the panel…
So the next correct solution would be to get a professional to replace all our flyscreens with aluminium mesh, and then add some mechanical fixing to the splines to prevent them from pulling out. But that costs money, and sometimes you have to choose between priorities, and this is one of those choices that required some creative thinking.
My bargain basement solution
So if you want to go cheap, you can easily get fiberglass flyscreen from certain well known online marketplaces. In my case, I was able to get a 1m wide x 30m long roll of flyscreen for $50. That’s enough to do our whole 4 bedroom house.
But by itself, it’s not strong enough. The cats can still climb on it, break it, and pull it out, and then escape. Poor things; they just want to be free.
But then I came across Kaizen 3D prints online. They introduced me to the idea of using fabrics and meshes inside 3D prints, by pausing the print and placing the mesh inside. I always love a clever 3D printing technique, and this one really got me thinking.
I thought that the fibreglass mesh might be too thick. So I put on a test panel, and it worked instantly, on the first try. And the result - a much, much stronger mesh that was embedded into the print. My test holes were about 60mm diameter (exposing 60mm diameter of mesh), and I couldn’t break it by hand or separate it from the frame. I was pleasantly surprised by this result.
But could we make a whole window frame worth of this work?
Enter the parametric design
I very much enjoy using Fusion 360, and it would be kind of ideal for this design - enter in the window dimensions, and pop out a ready to print file! As much as I like Fusion 360, sometimes I want a little more power (especially with arrays) and also a little less lock in. So for those, I’ve been using build123d to generate CAD designs. Plus, LLMs are quickly learning how to generate these programs; they still struggle with the spatial awareness, but with some coaxing and thinking, they are able to generate appropriate designs. This did take the LLM quite a few goes to get the connector placement correct, but we got there in the end…
So you can see the code on GitHub which can take a given window size, and generate a set of frame panels for it that fit your 3D printer. The parameters for the frame are configured for my Dowel Window supplied Australian Frames - but there should be more than enough settings for you to tune it for your windows.
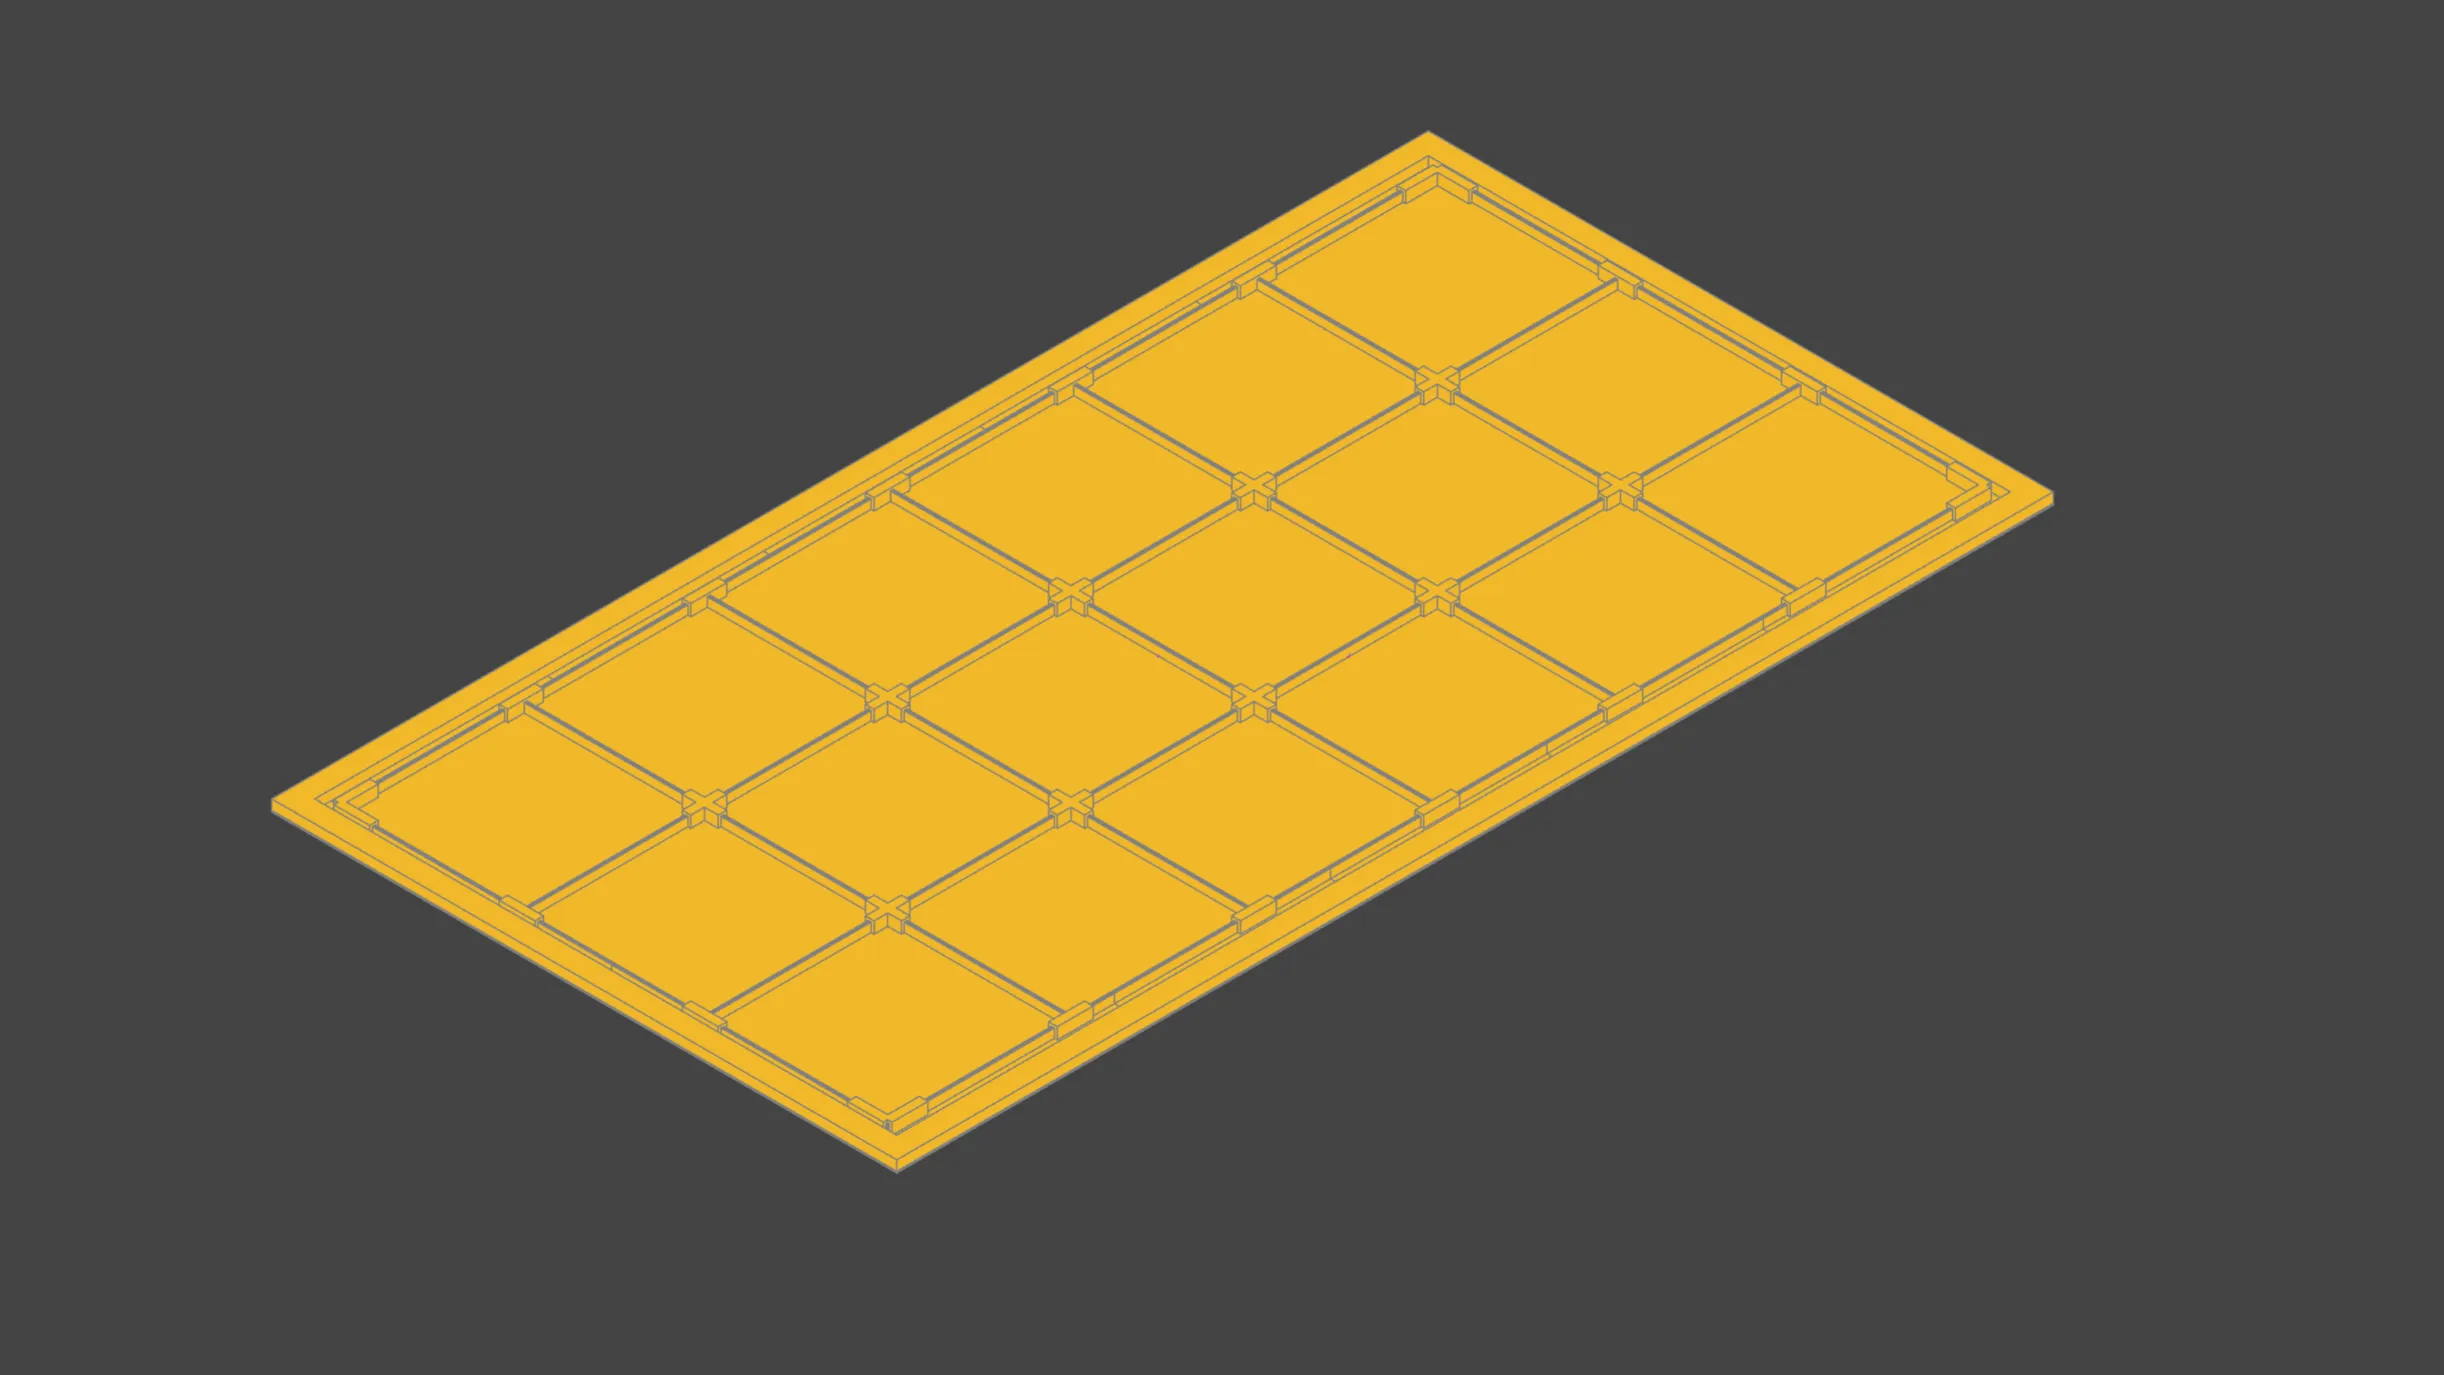
Decoration
In the design above, you can see that the panels are solid - that’s strong, but not the intent - as they won’t pass air and will block the light! So the intent is to have them with decorative cutouts to allow air to flow, but also brace the mesh inside the panel.
Originally, I had the build123d script take these decorations in and adjust the shape. This kinda worked, but was extremely slow - as they were decorative touches, they contained a lot of extra geometry that build123d didn’t handle well.
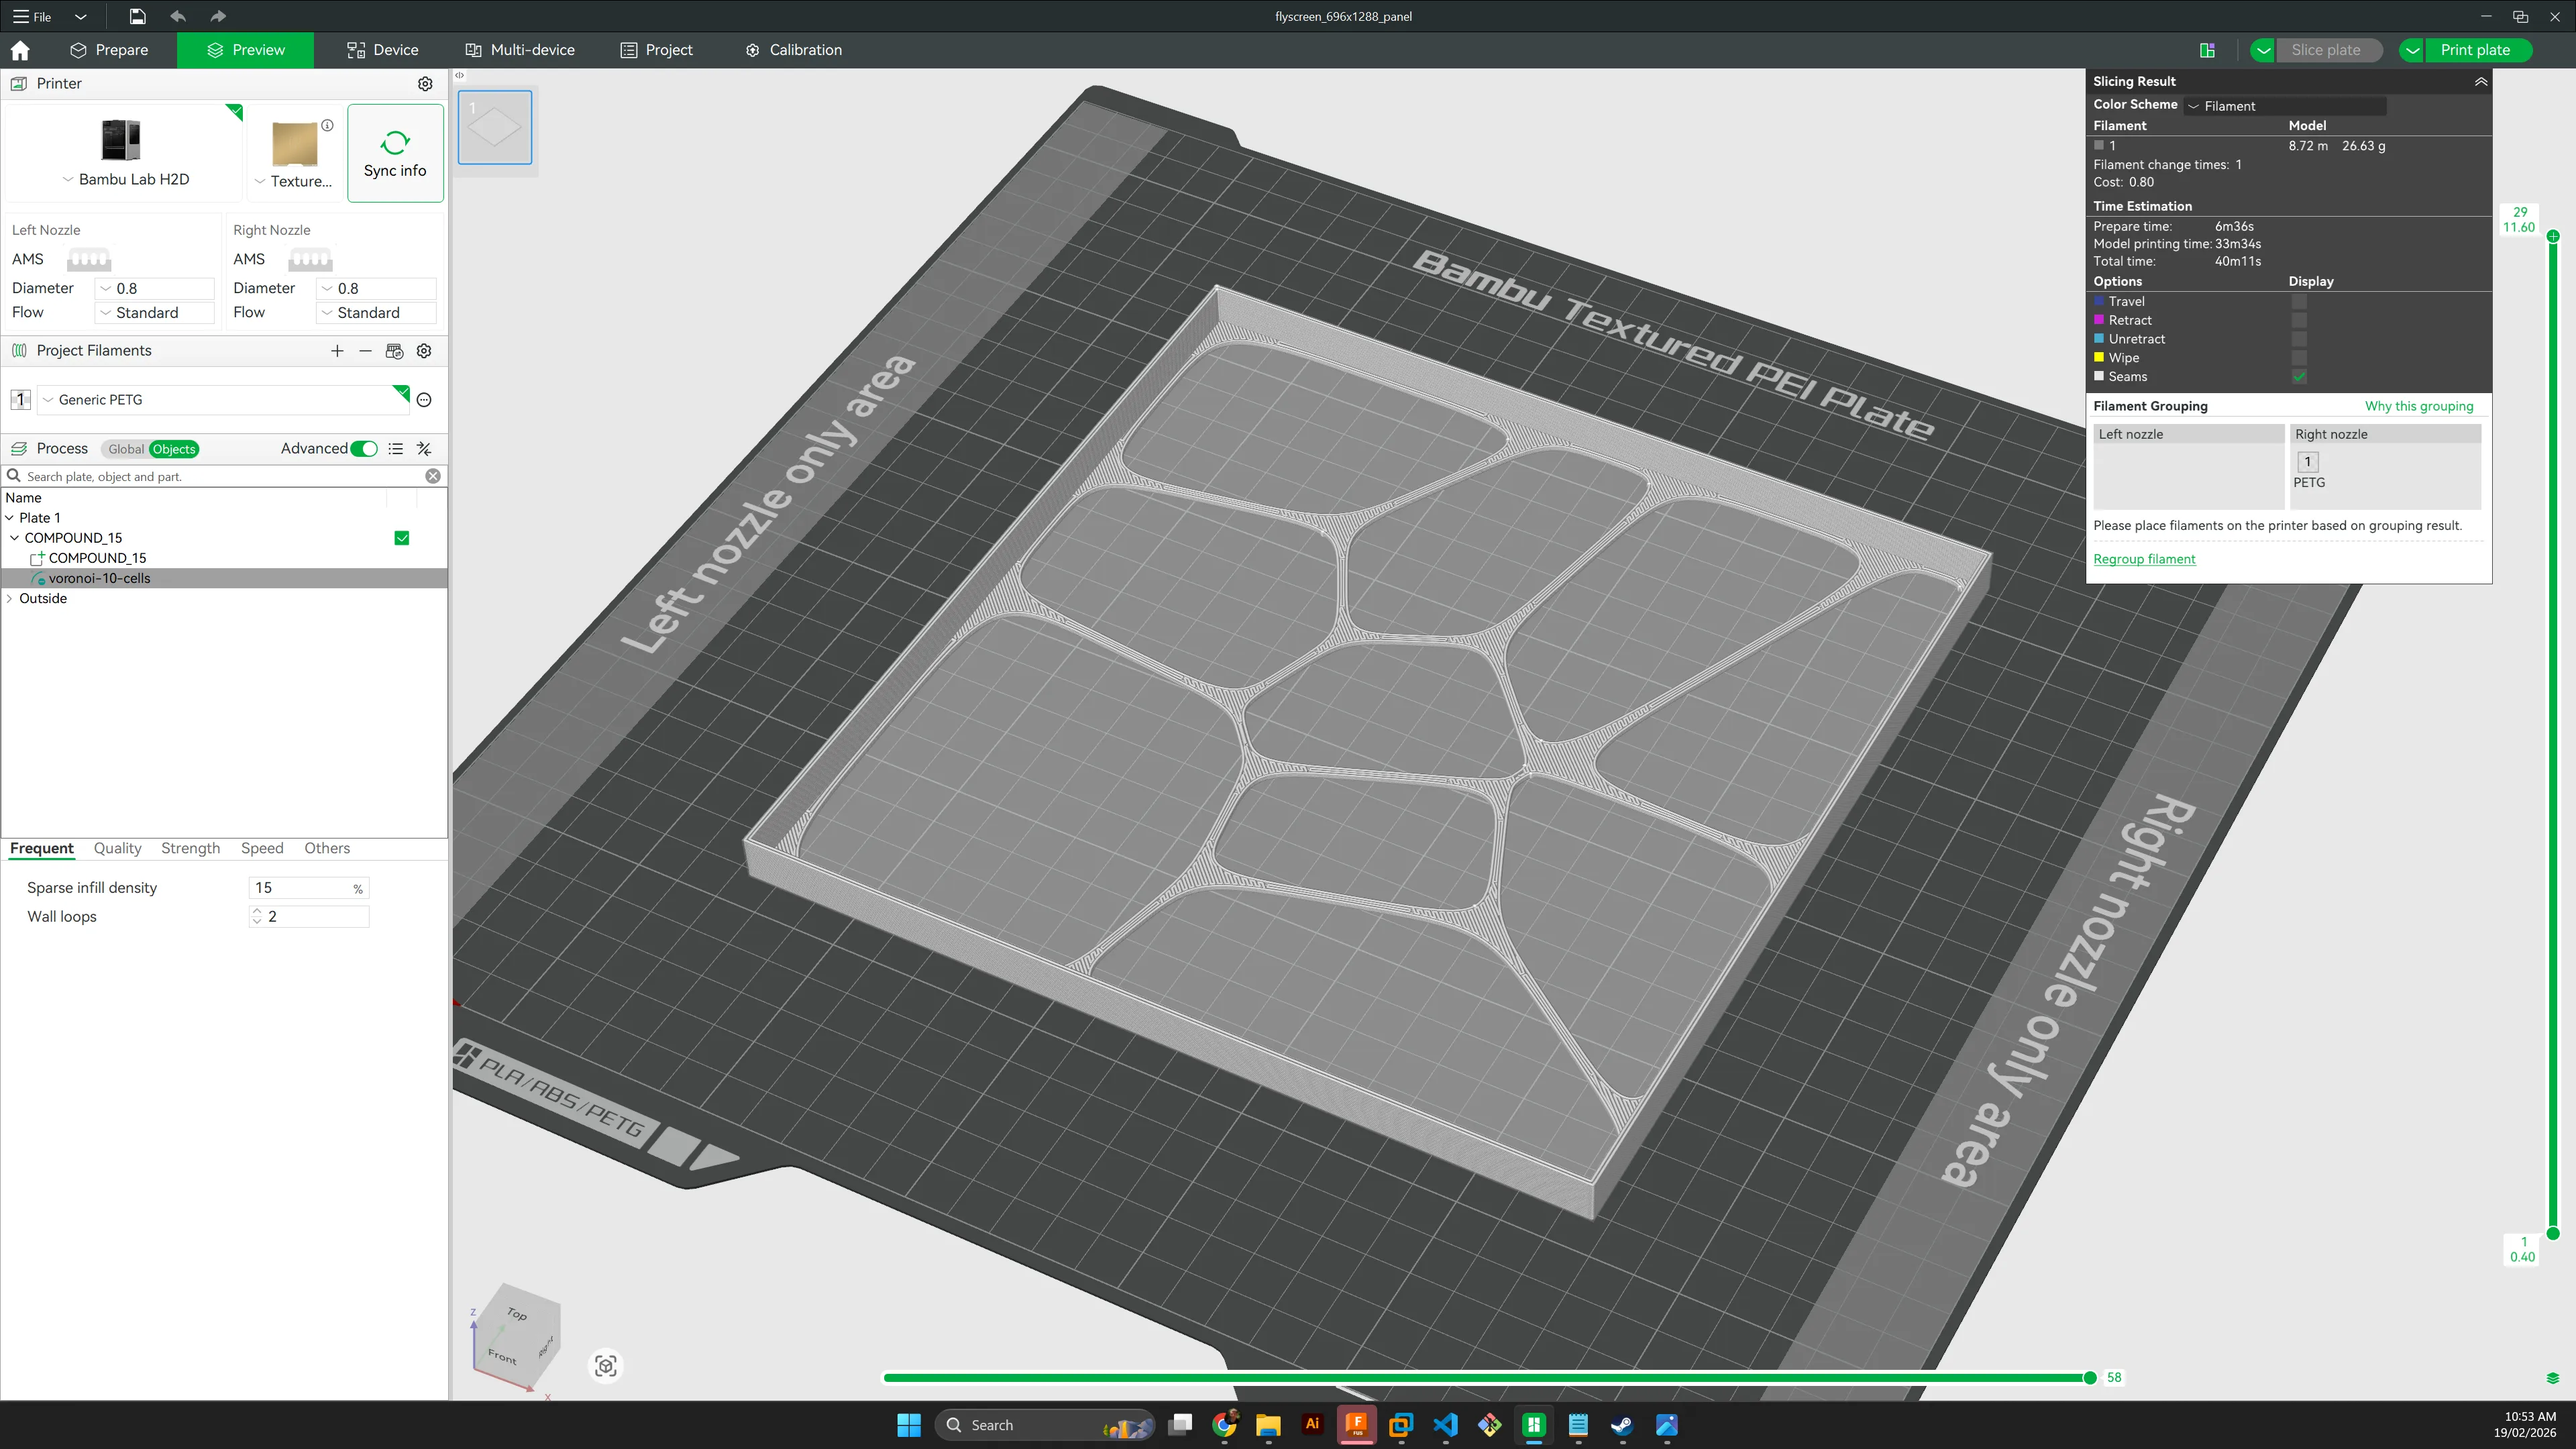
But it turns out this is easy enough to do in the slicer - in my case, Bambu Studio - and given each panel is the same, you only have to do it once.
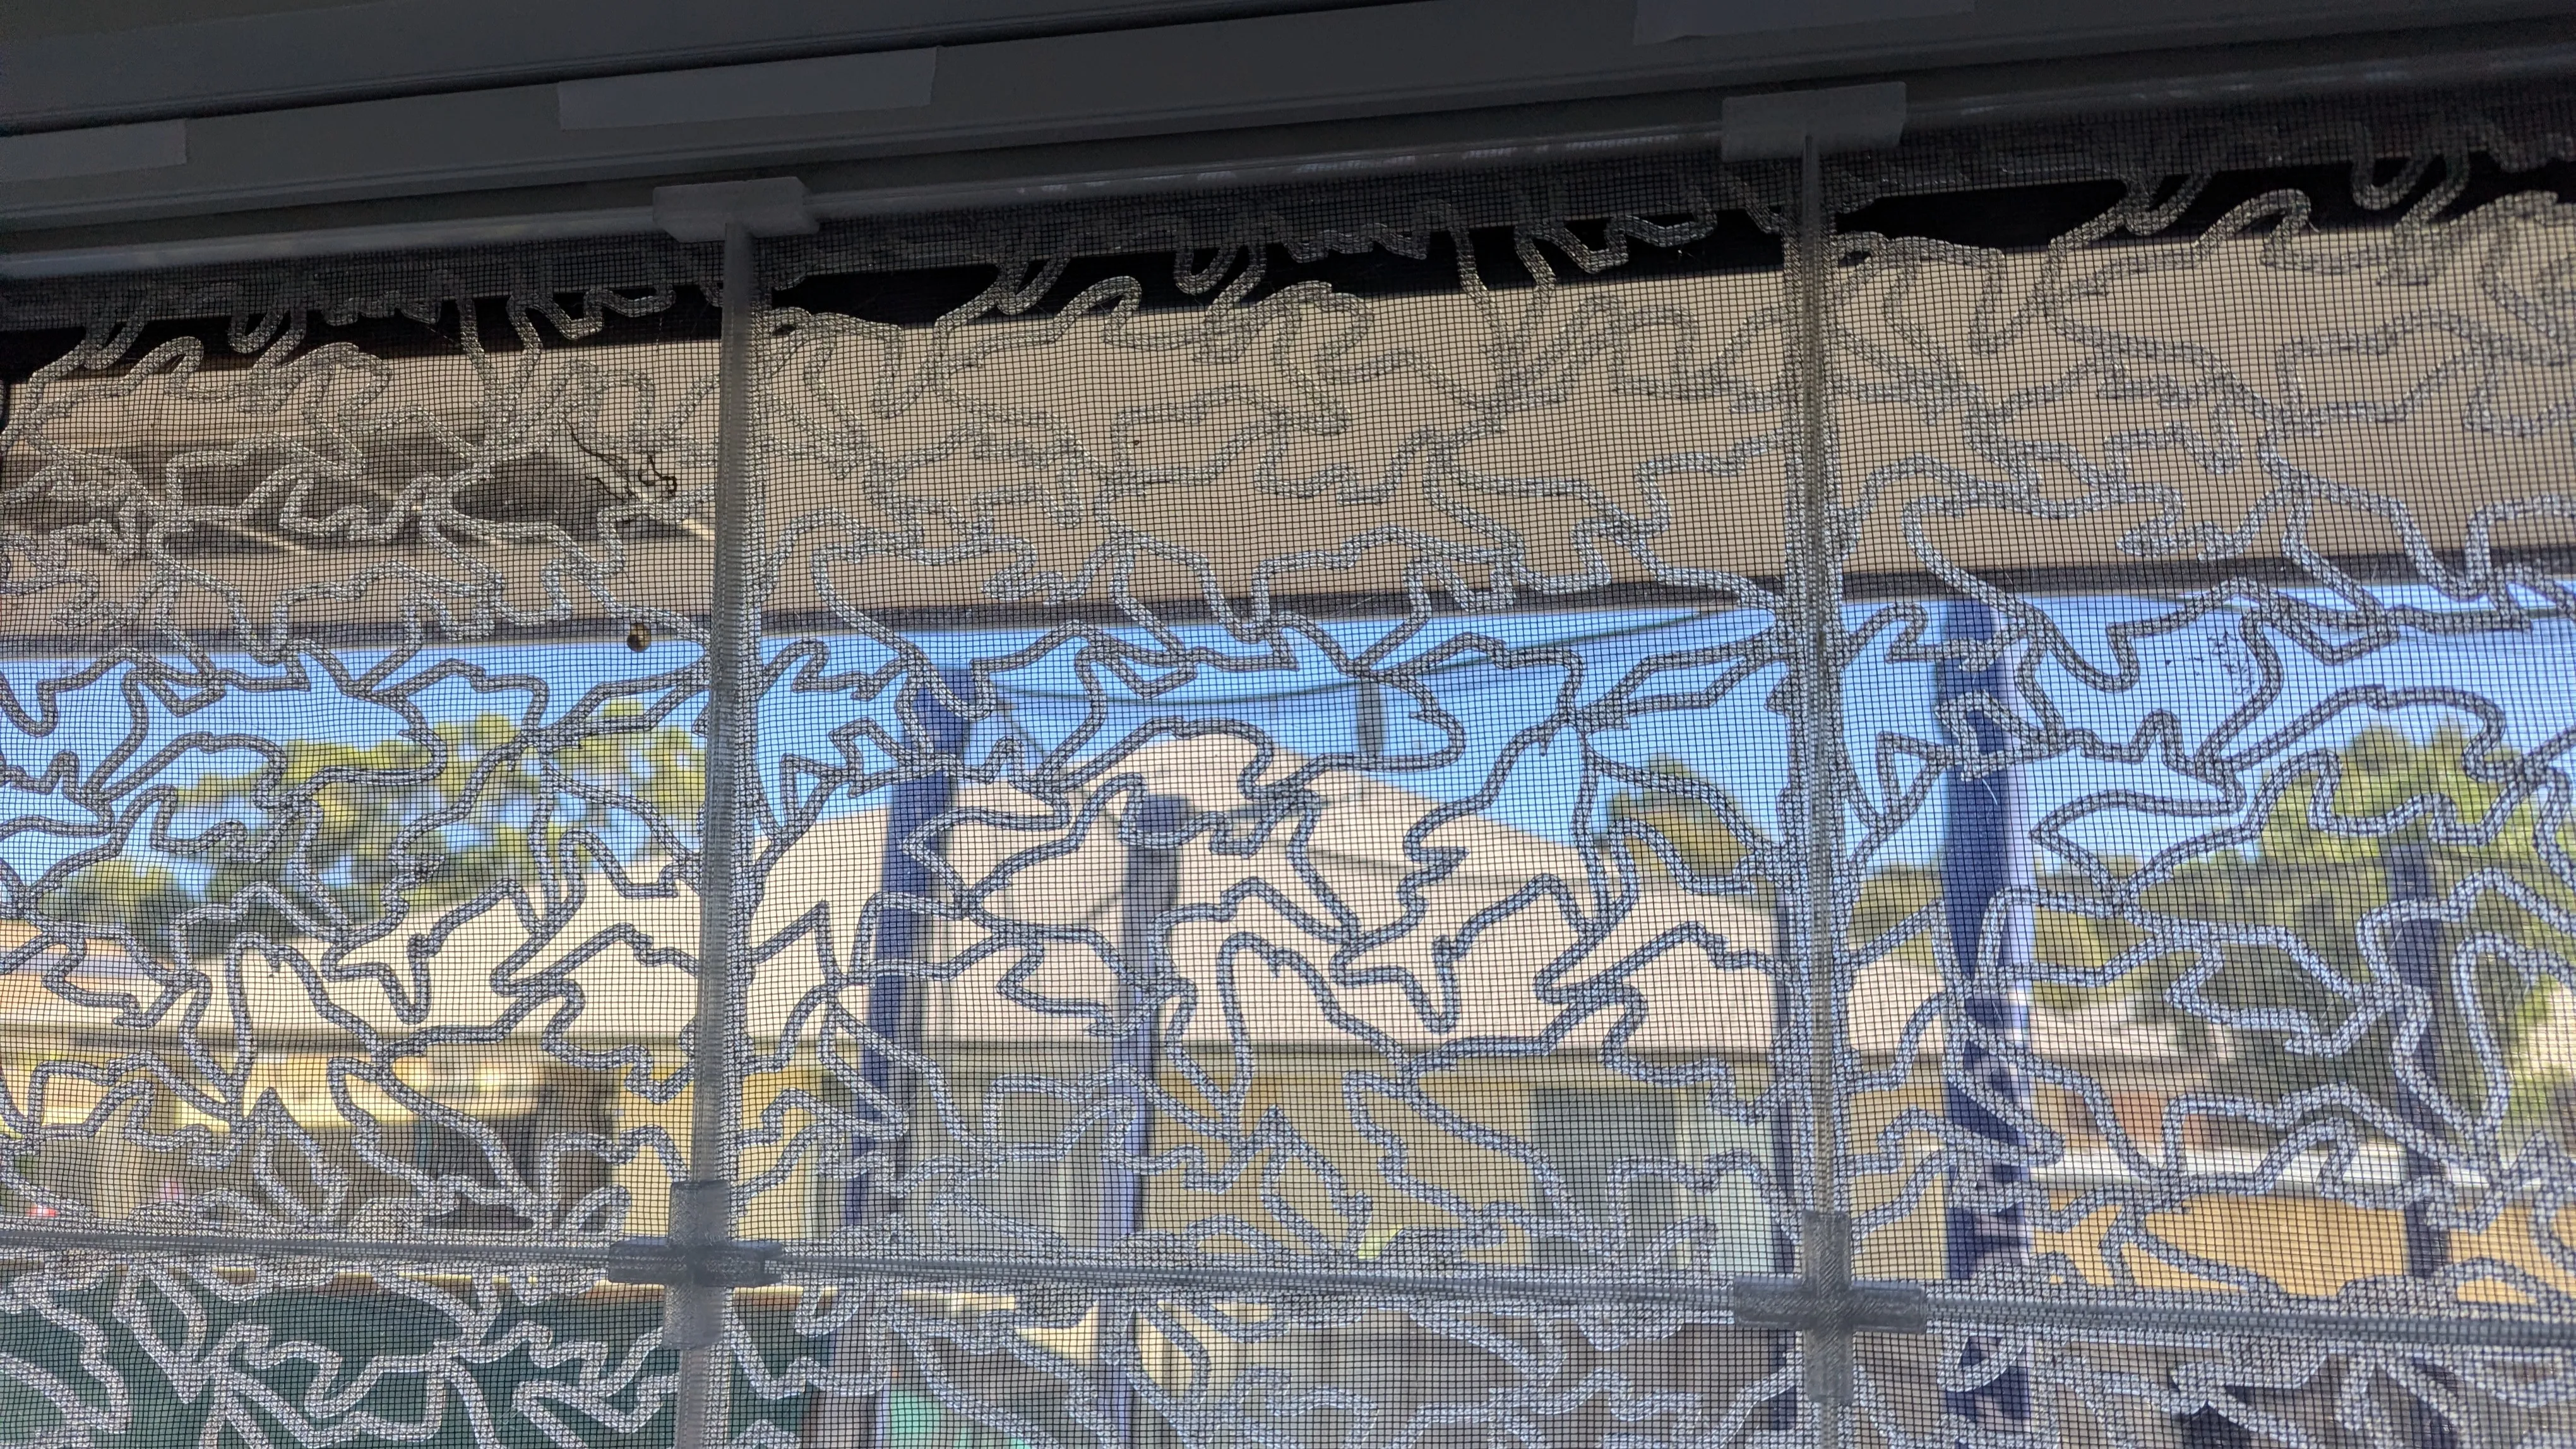
And for my daughter, here is a shark themed pattern:
Printing
So this was designed to print with a 0.8mm nozzle; so with 0.8mm line widths and 0.4mm layer heights. This was chosen for speed and strength. I also chose to use PETG for temperature and shock resistance, and used “natural” or transparent PETG to allow as much light through as possible.
The geometry takes the 0.8mm nozzle into account, so the edges are designed to be 1.6mm wide (2 layers), and the base is 4 layers (1.6mm) thick.
The intent is to print 2 layers (0.8mm), pause, and then insert the mesh, hold down the edges with magnets, and then resume the remainder. This worked amazingly, and is faster if you cut the mesh into slightly bigger squares first, so you can just feed them in. After printing, just trim the excess from around the edges with a sharp craft knife. It didn’t take long!
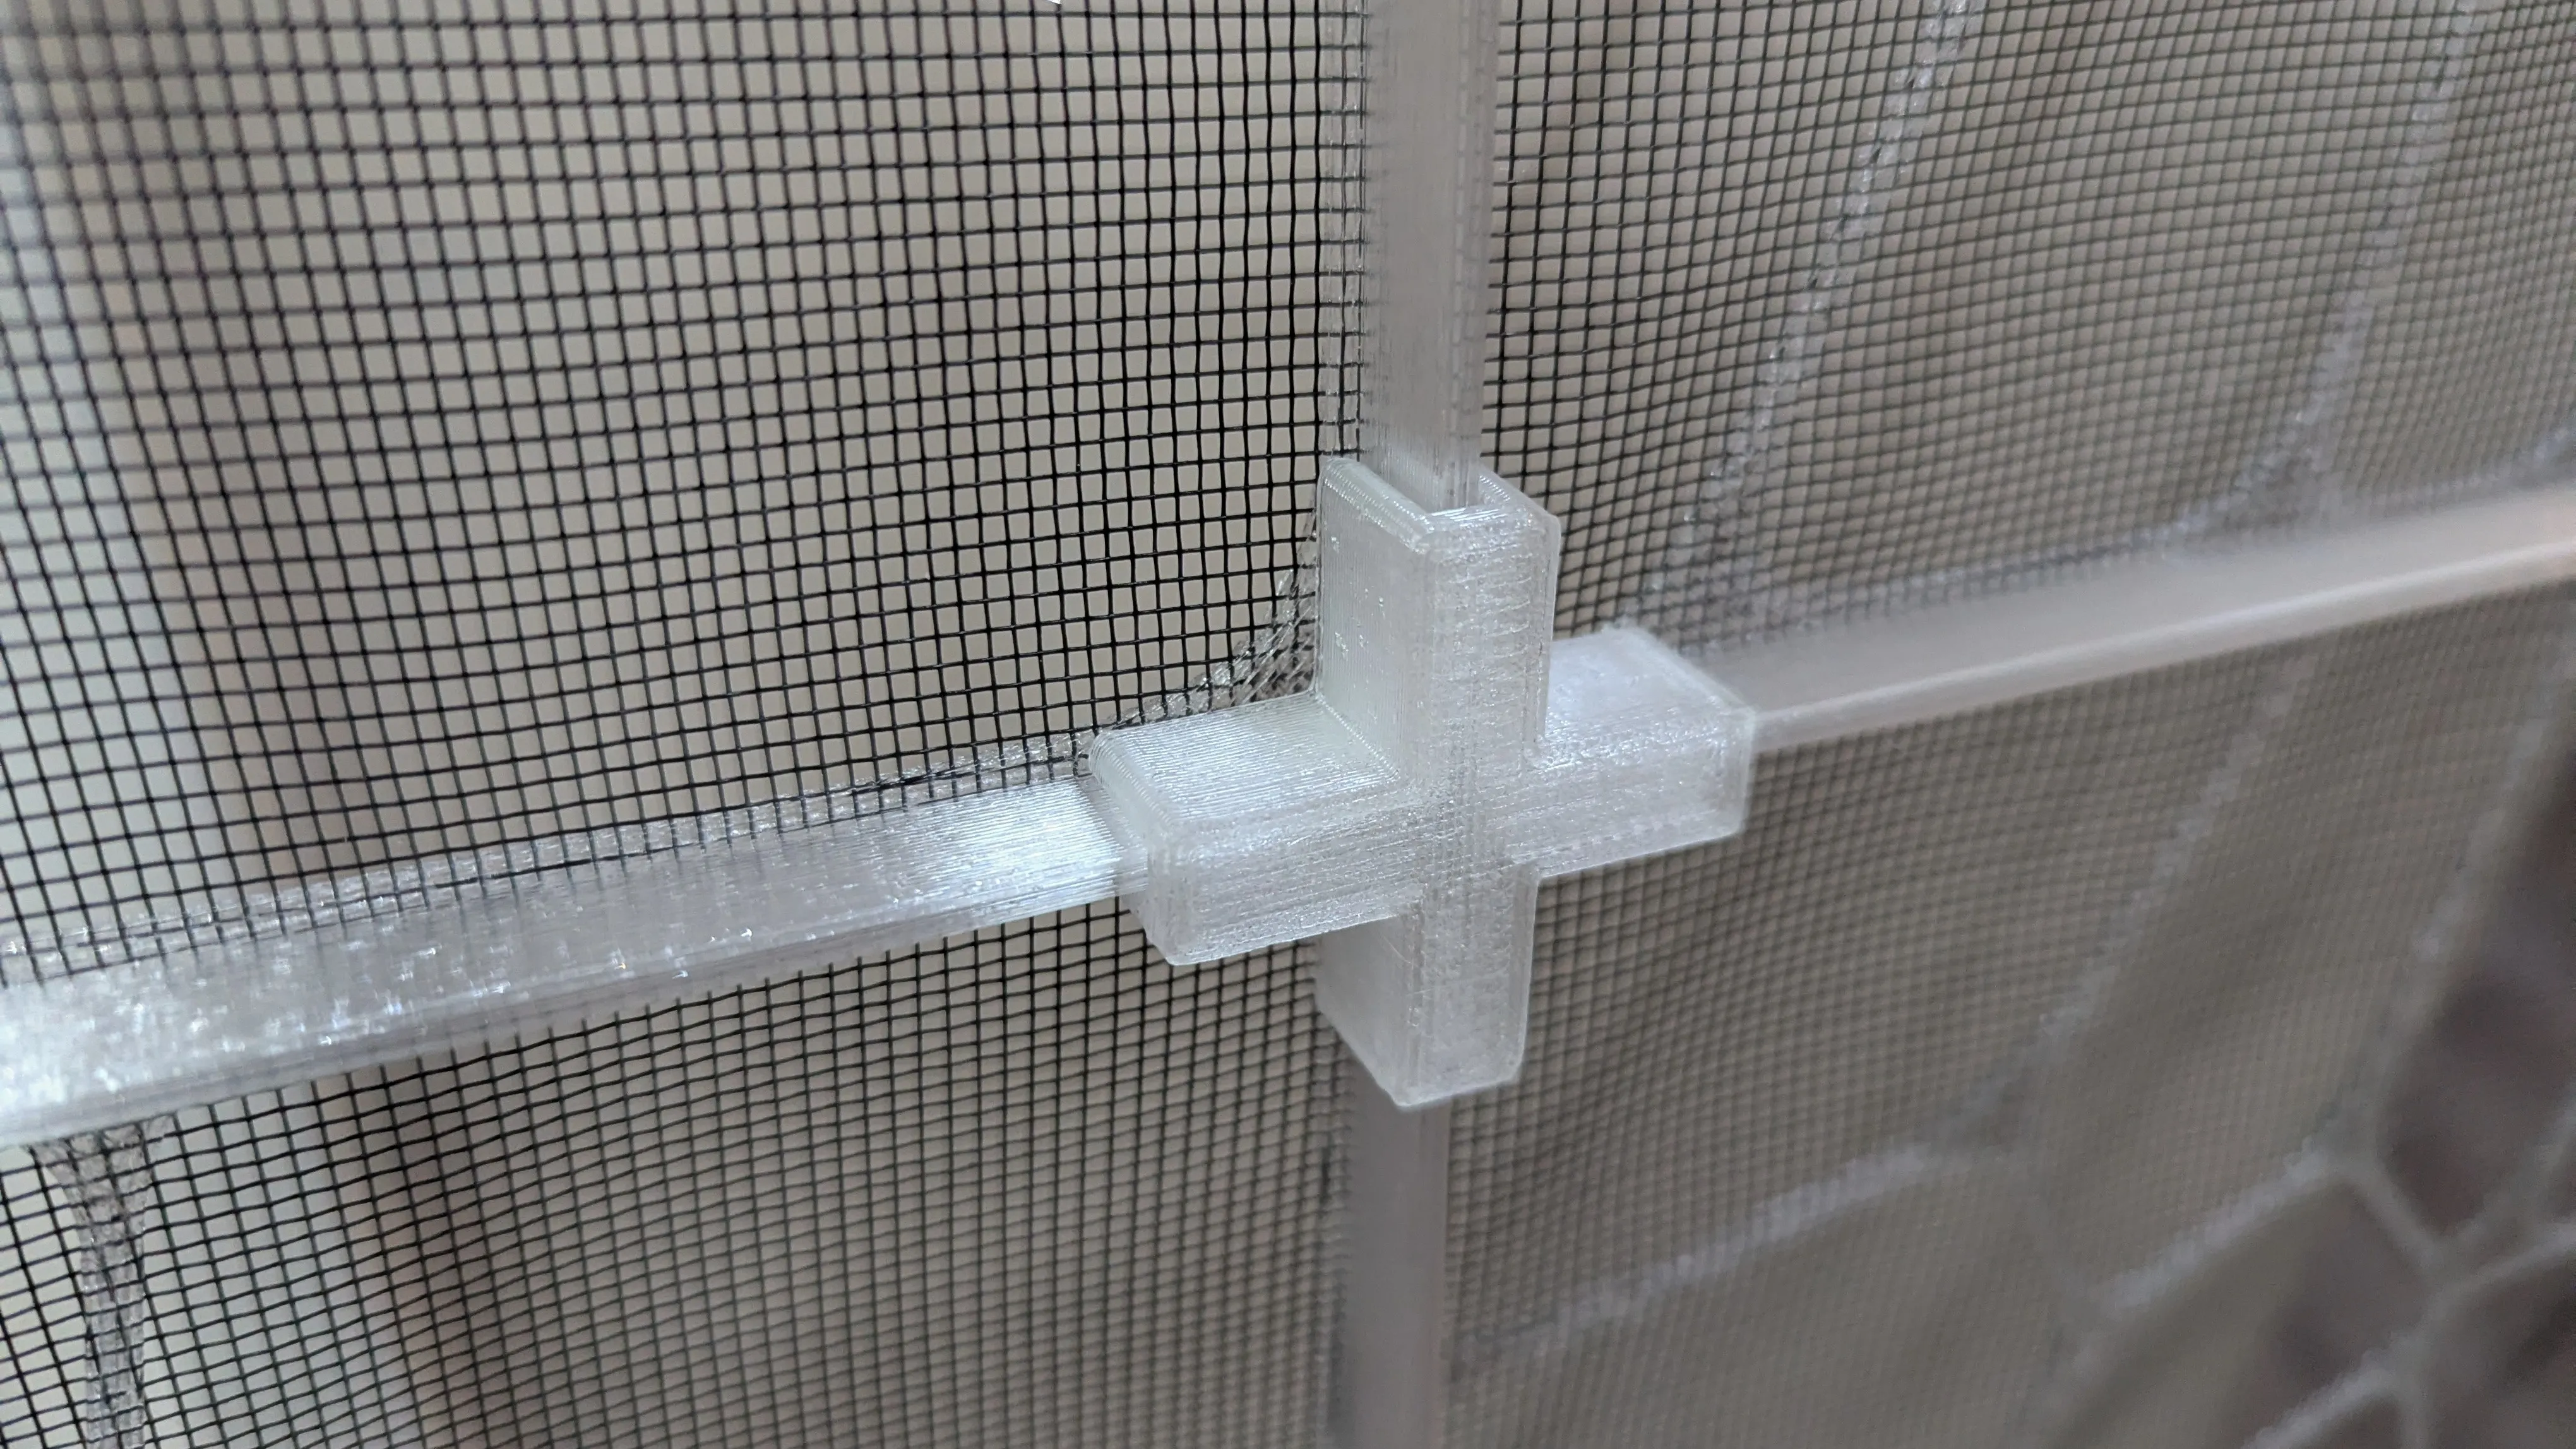
The frame edges and connectors are all printed separately; this took three prints for me. The push fit connectors were printed upside down on the plate.
Filament usage and time
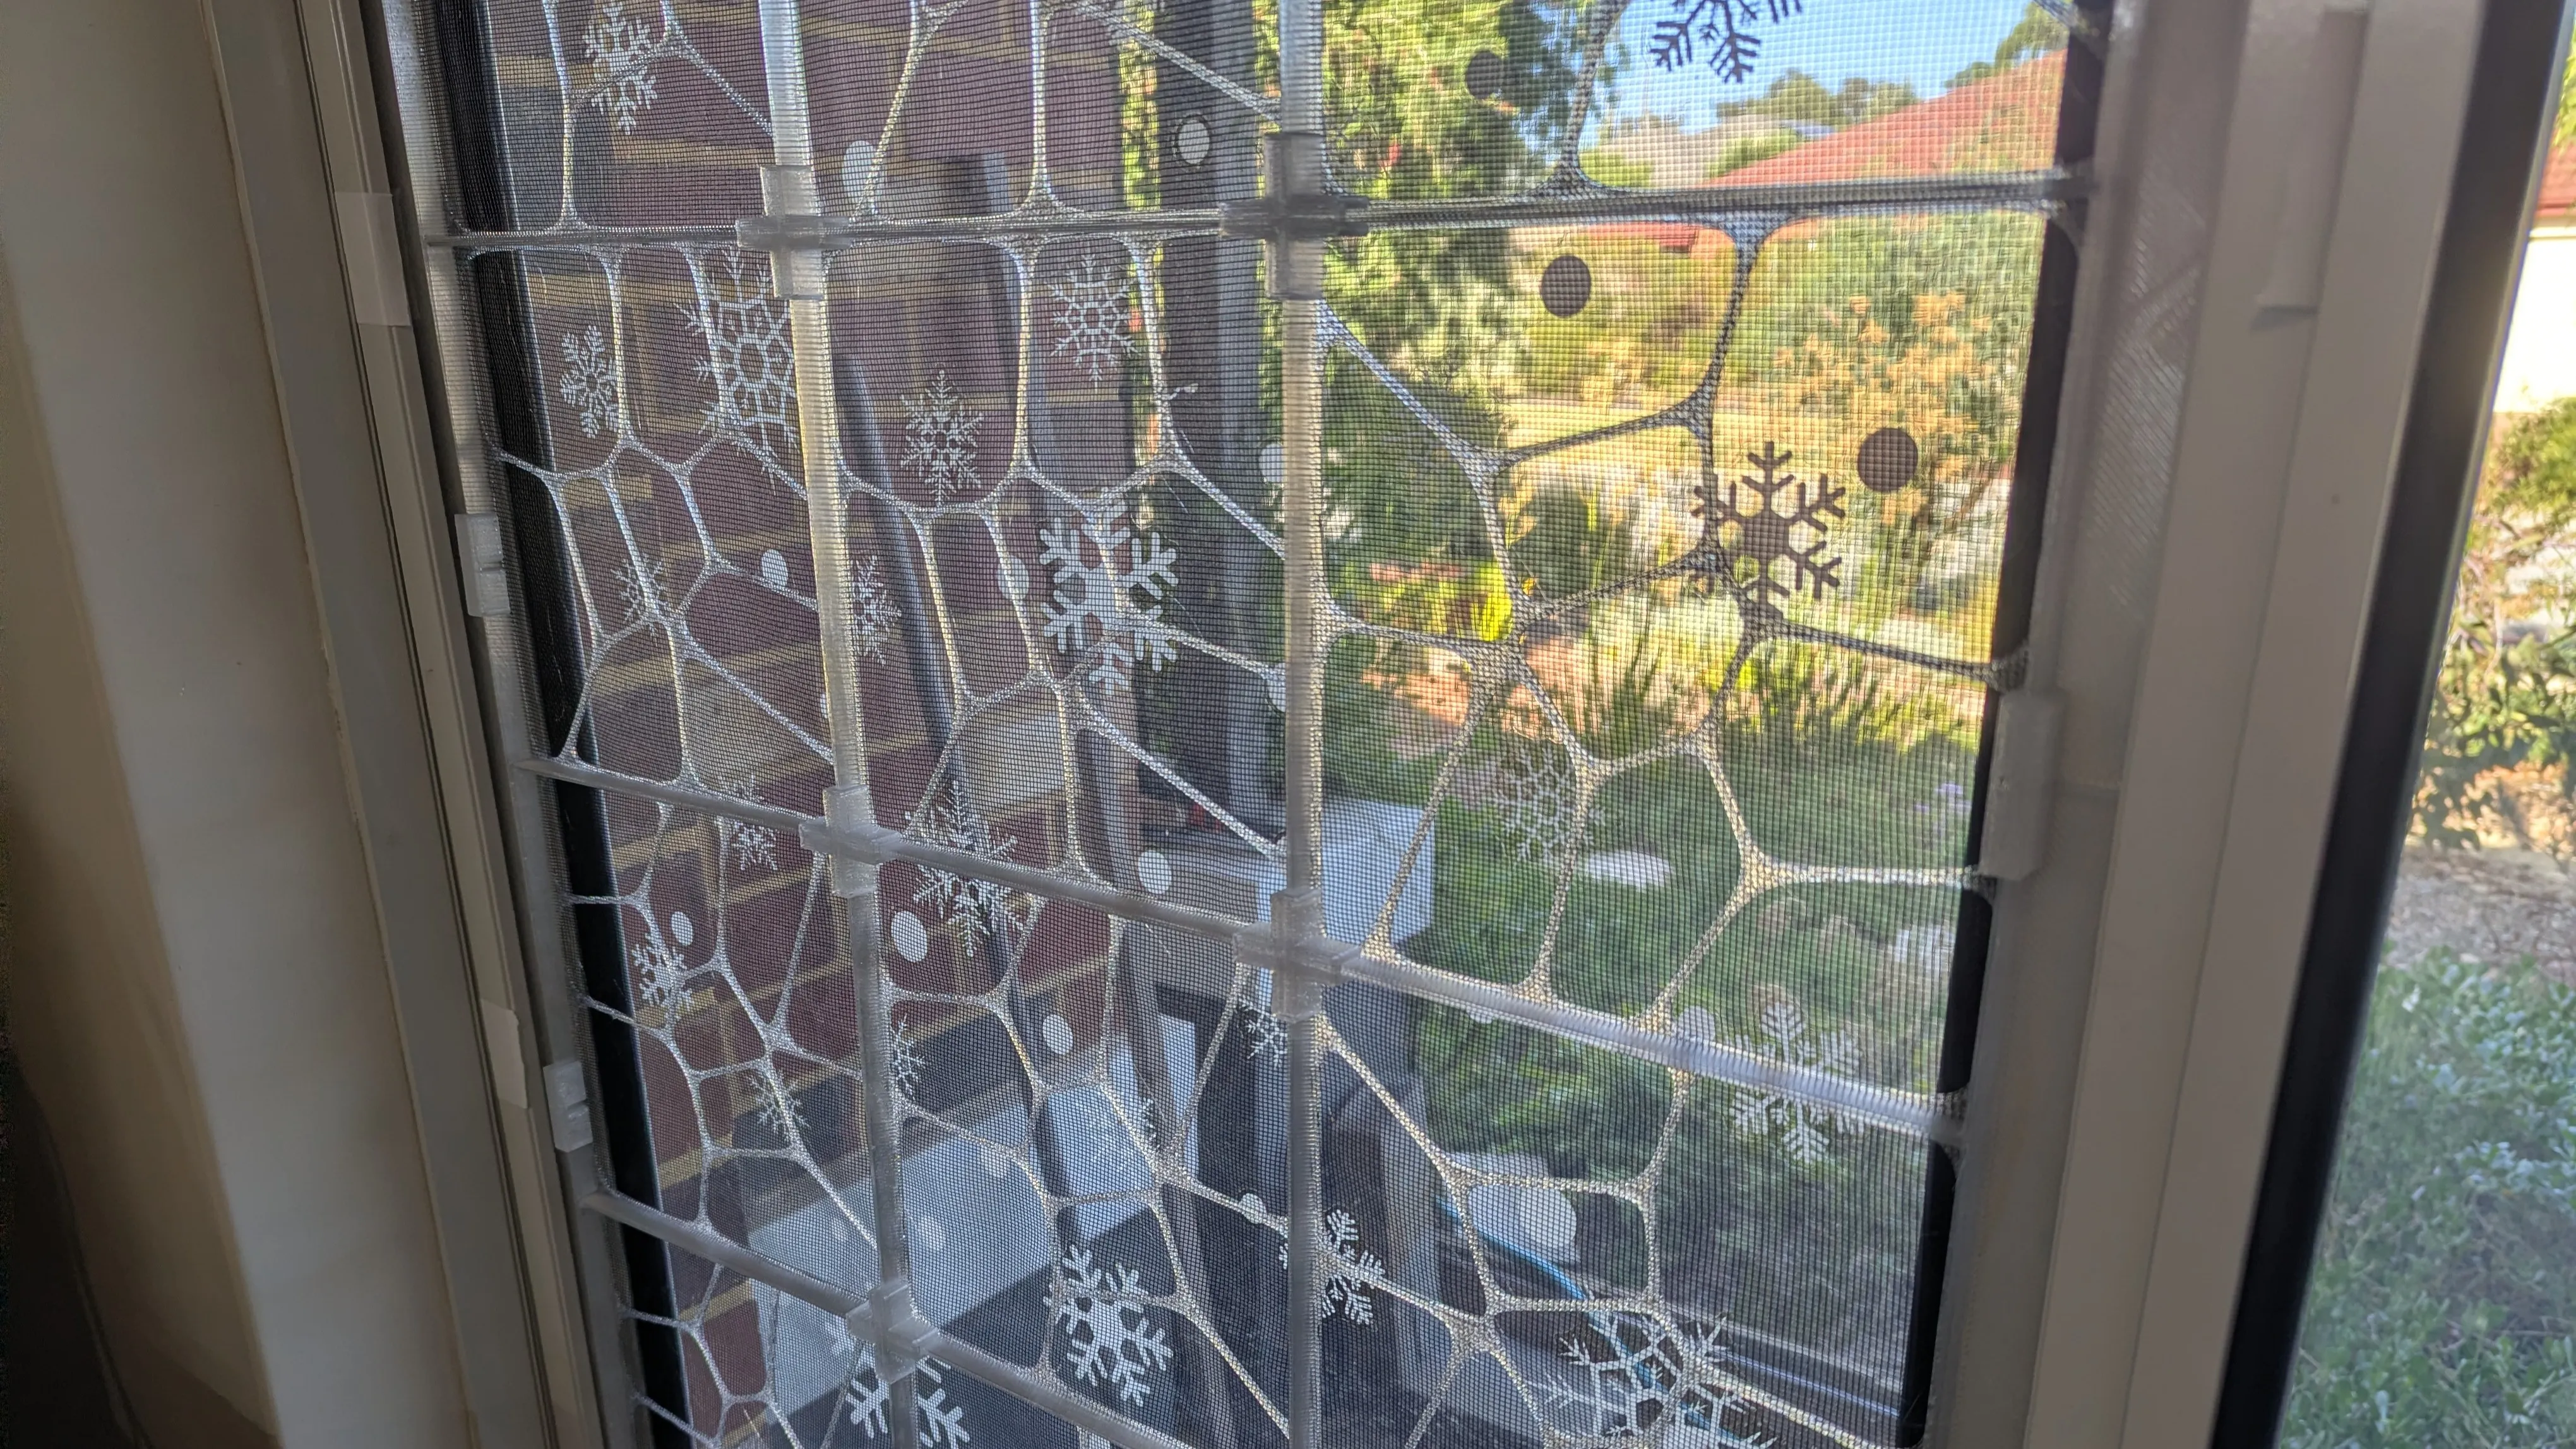
Yes, it’ll use a bit of filament. But not an excessive amount. For my front window (pictured at the top of this post), to cover both windows with frames that are 1288x696mm, the frame panels (18 each, 36 total) took right on 1kg of filament - 27g each + some purging - so basically $20. Each panel took about 50 minutes total to print. I previously ran a business making things with laser cutters and UV printers, so I’m used to doing bulk operations with CNC machines, and generated a routine as I normally do to get them all done.
The remaining parts - the clips and edge brackets - took another 500g of filament to complete - which did two panels. So the total filament used for the photo at the top is 1.5kg.
For the flyscreen, given it was 1m wide; I cut it into 250mm x 250mm boxes, efficiently using 2.25m of flyscreen for the windows shown. So this contribution was $3.75.
The remaining costs were the printer itself (which I also regularly use for many other projects) and power - although we’re solar powered at home and I printed this during the day, so that should be negligible.
Assembly
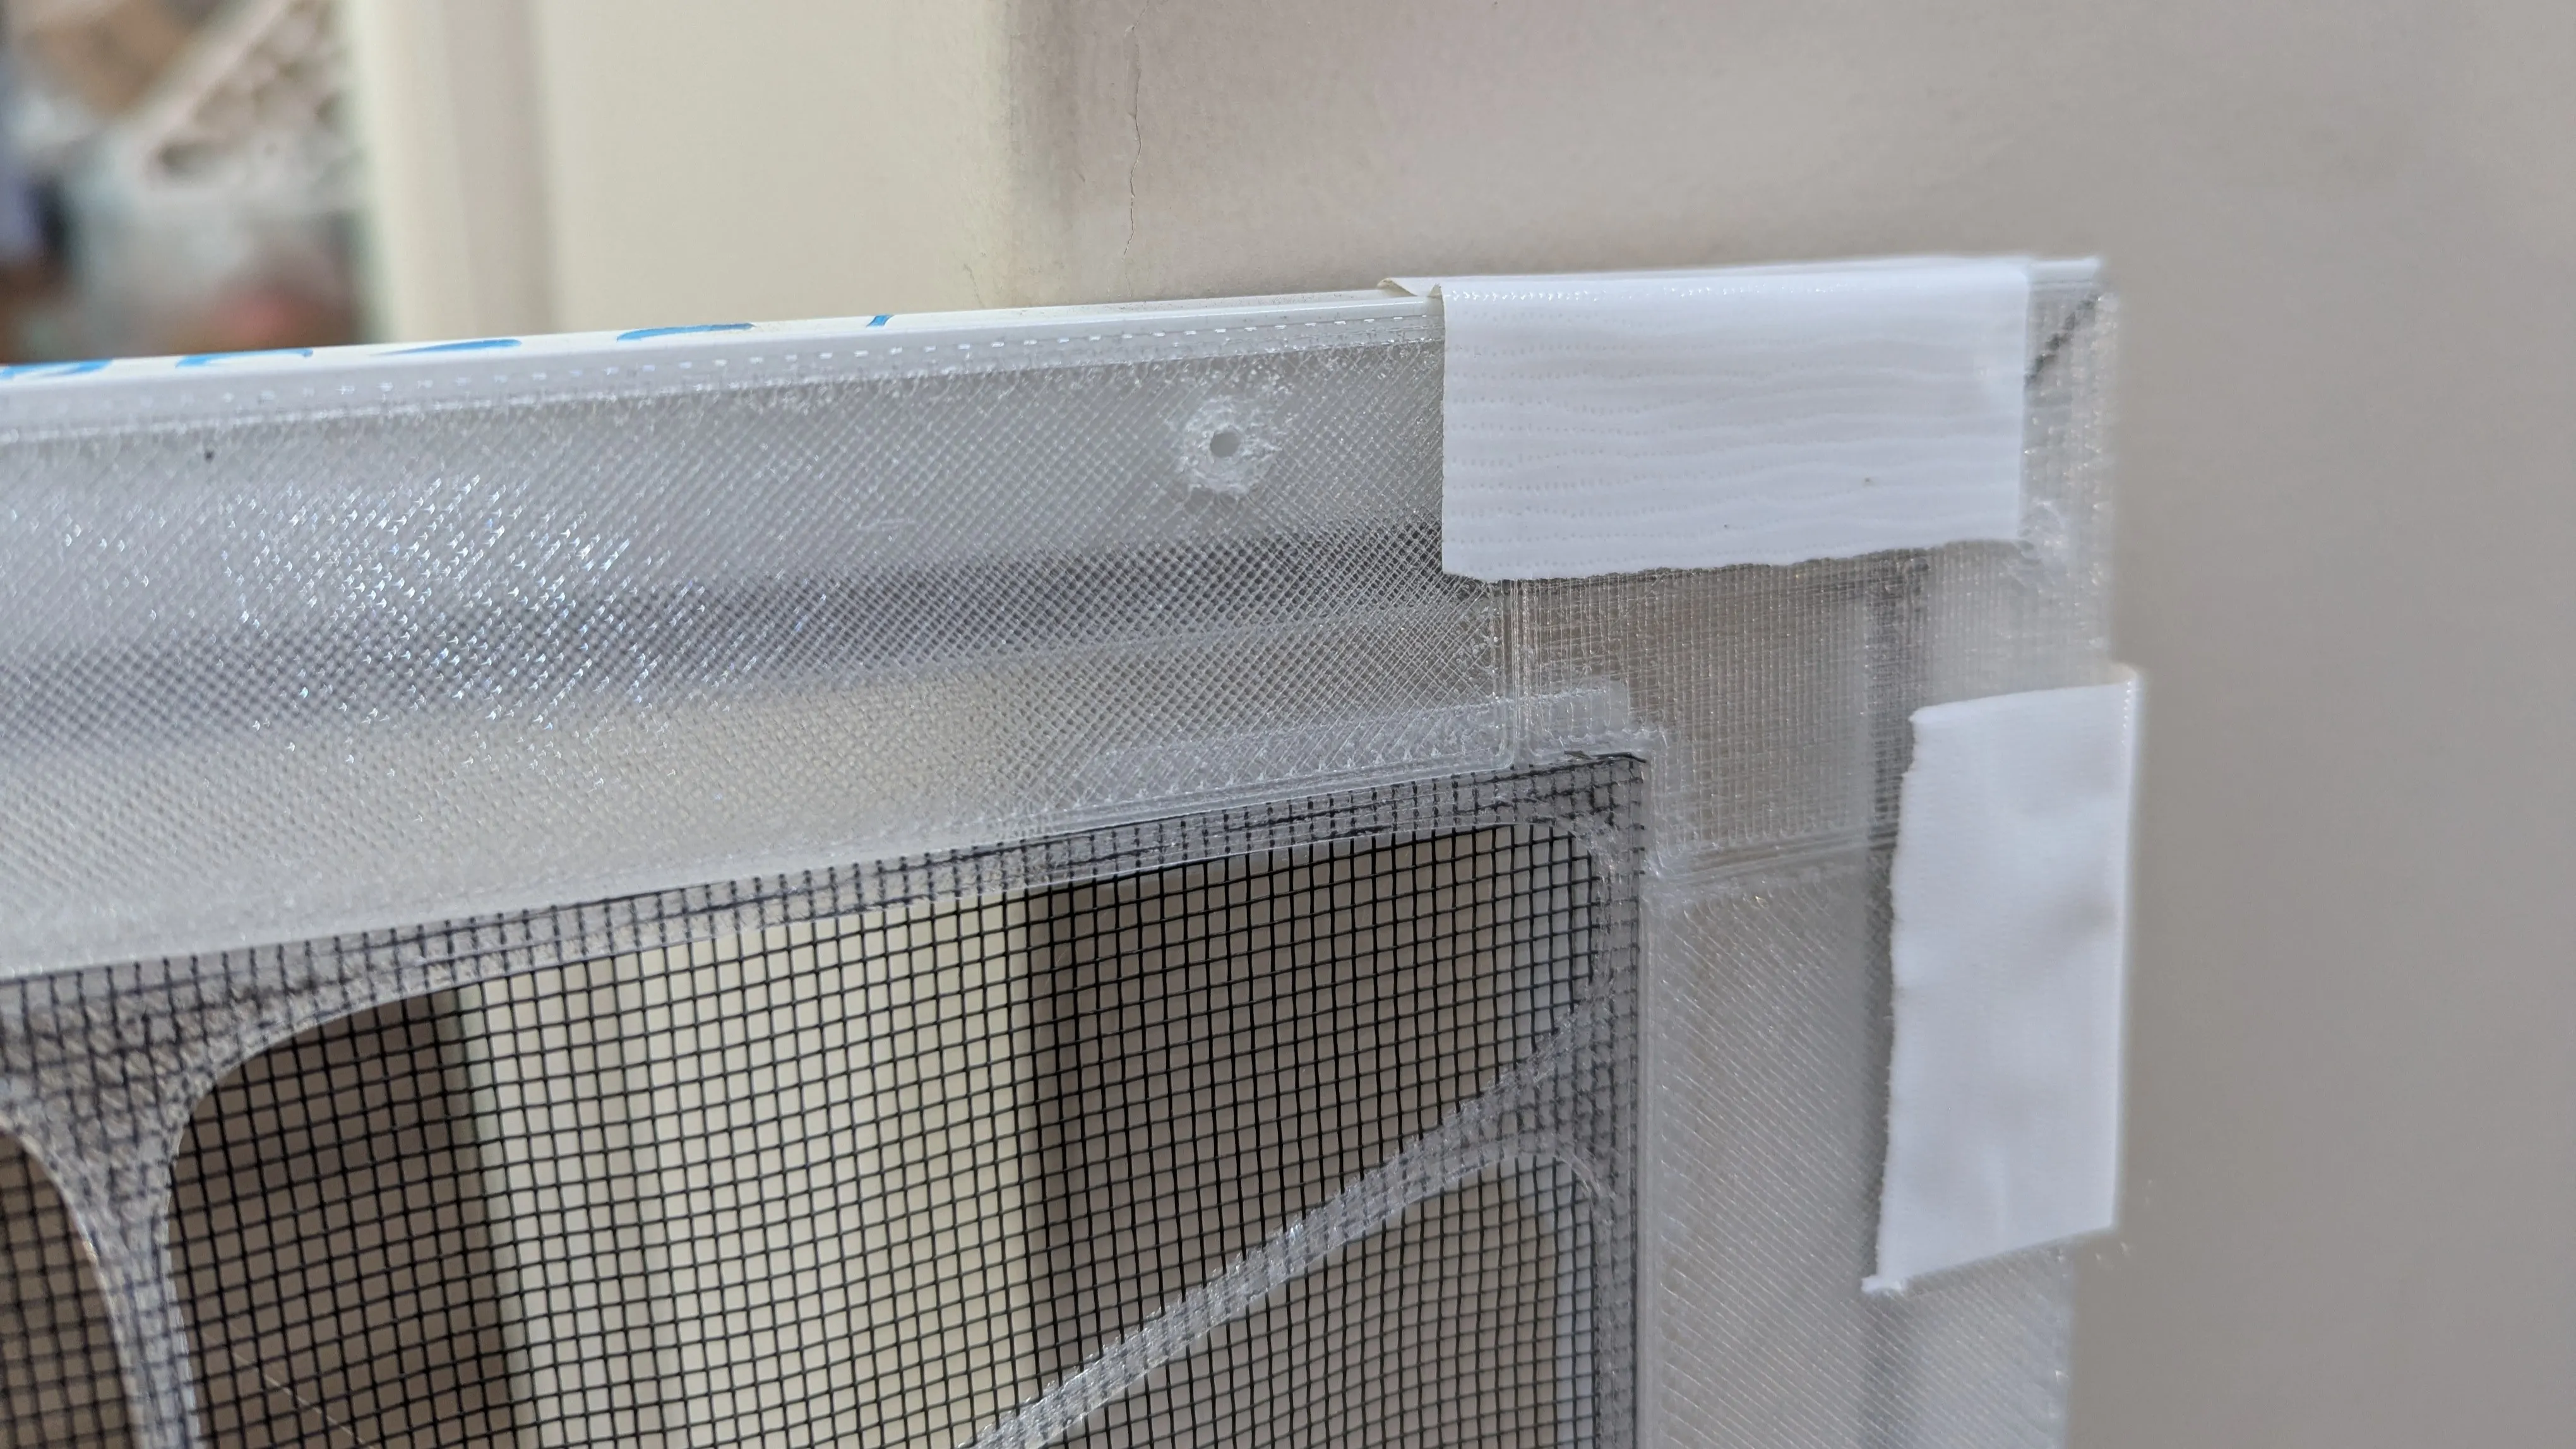
Once you’ve got all the pieces, you can just lay them out, and push fit all the connectors together.
The edge joiner pieces all have holes, and the intent is to drill holes in the frame and use pop rivets or self tapping screws to join them to the frame. However; I got a little lazy and decided to use cloth tape to join them to the frame; turns out this works a treat and is strong enough.
Then just put your frames back in!
Final thoughts
I love this and I hate it at the same time. It’s a cheap, temporary solution, but it works for the moment, and keeps the cats where they need to be, keeps the air flowing in summer, and is just enough wife and children approved to be permitted as a temporary solution.
At some stage, we’ll save up some funds and arrange to get a professional in to redo all the flyscreens properly. But for now, this will have to do and is cheap enough to implement!